
Balloon Numbers - Pretty Pink Posh

Hello crafty friends! I have a birthday box card to share with you today. For this card, I used a combination of old and new stamps from Pretty Pink Posh - Balloon Numbers, Birthday Scripts, Birthday Wreath, and Cupcake Critters


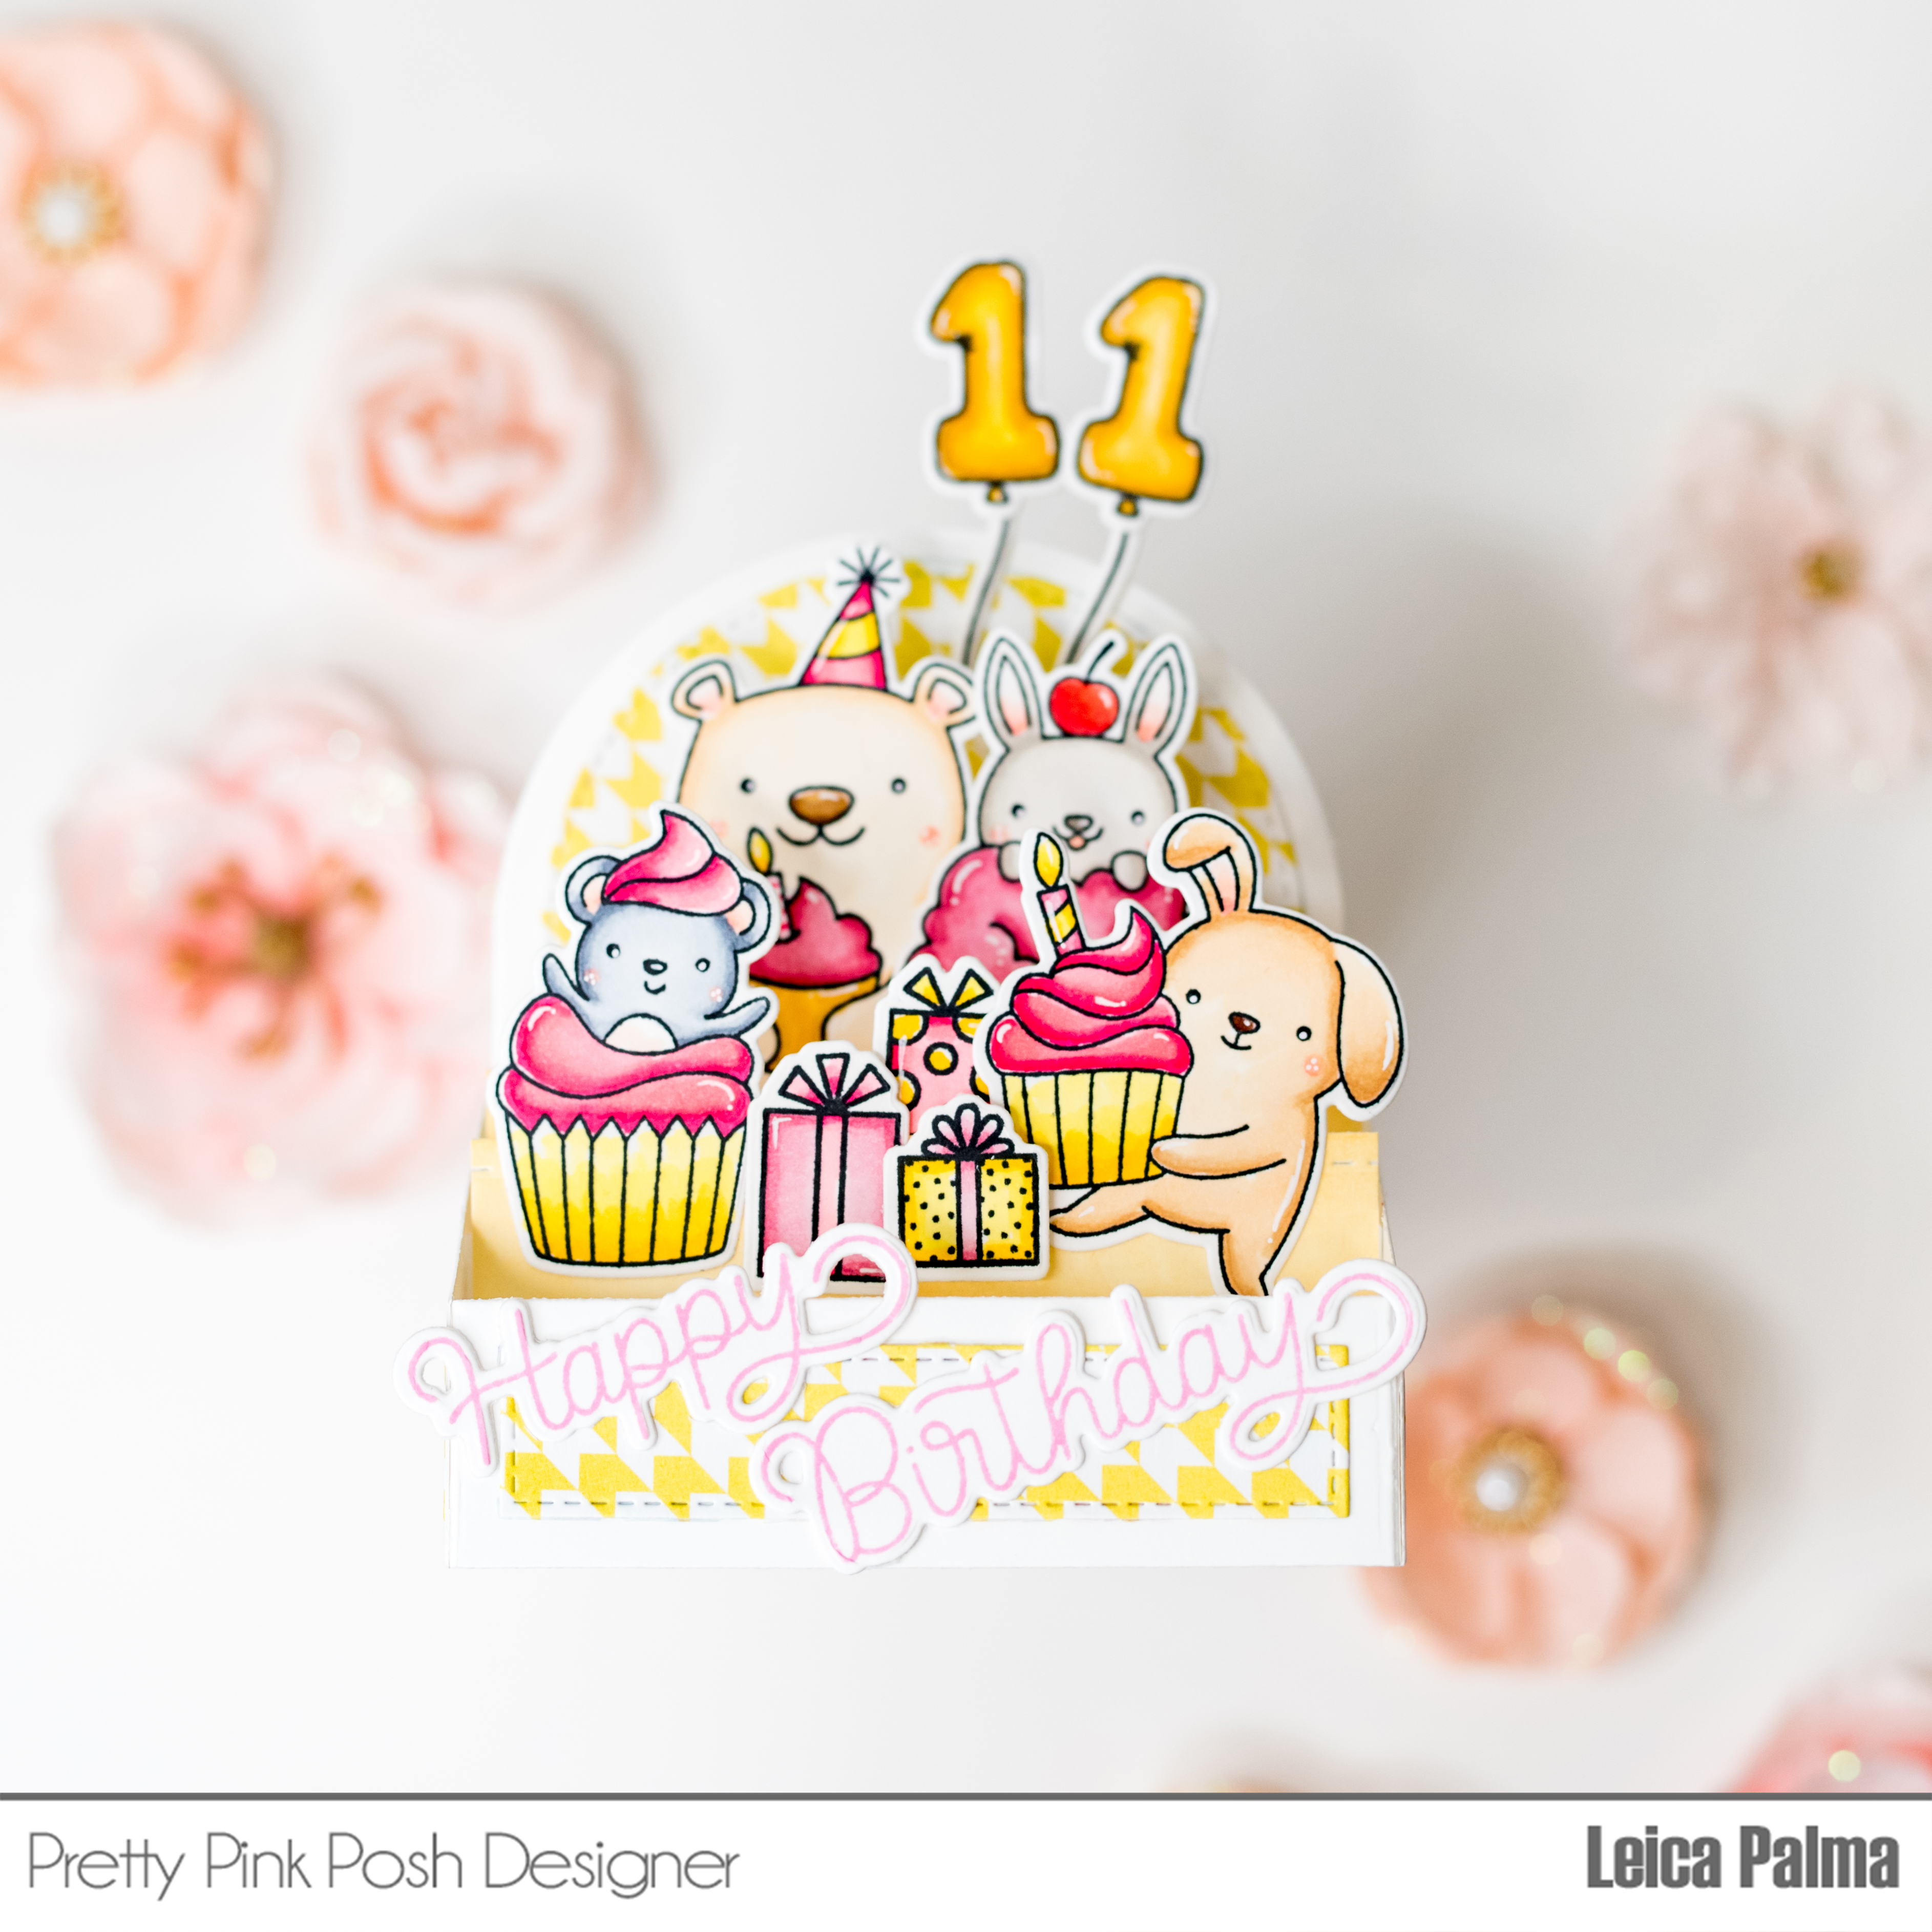
Let's get started! I first assembled the My Favorite Things Outside the Box Level Up die in white cardstock and used patterned paper for the panels. I then added 2 inserts for all the stamped images.

Next, I stamped, cut, and colored the critters from the Cupcake Critters stamp set, the small gifts from the Birthday Wreath stamp set, the number 11 balloons from the Balloon Numbers stamp set, and Happy Birthday sentiment from the Birthday Scripts stamp set. I used Copic markers - E31/30, 51/50, R85/83/81, RV25/23/21, YY18/15/13, and YR23/21/20. Lastly, I adhered all the stamped elements onto the card front and inserts with liquid glue.


I love making box cards and I hope that I have inspired you to create one. Thanks so much for stopping by today!

Comments

  1. Leica!! This is completely adorable!! LOVE it LOVE it!! :)

    ReplyDelete
  2. Amazing card, Leica! It's fantastic! I have the "Outside the Box" dies so I could do this - or I could try LOL. Your cards are always fabulous!
    TFS -
    Lori S in PA

    ReplyDelete

Post a Comment

Popular posts from this blog

Merriest Christmas Wishes - Pretty Pink Posh

Hello friends. I'm here to show you a super easy Christmas shaker card made possible by the new Pretty Pink Posh Tree Cover Plate . I get really excited when I can whip up a card in just a few minutes. Let's get started! First, I cut the Tree Cover Plate from light pink cardstock and glued a sheet of clear acetate on the back. I added foam tape all around the edges and in the spaces between the trees. Then, I sprinkled in some Christmas Cookie Shaker Beads . After that, I peeled off the backing of the foam tape and glued on a patterned paper that's A2-sized. For the words, I used white heat embossed with a saying from the Sentiment Strips: Christmas Stamp Set on red cardstock. Then, I cut it out with a die from the Sentiment Strip Dies and gave it some extra pop by mounting it with foam. To make things extra special, I added Metallic Gold Pearls here and there for a touch of sparkle. I'm just thrilled with how quickly this card came together. I hope it gets your cre...

Merry Christmas - Pretty Pink Posh

Hello friends! T oday I've got a delightful Christmas shaker card featuring the Pretty Pink Posh Stocking Shaker Die as the star of the show. This card is a breeze to recreate, so let's dive right in! First things first, I took some pink cardstock and cut it into a large rectangle using the Eyelet Rectangles Dies. Then, I used the Stocking Shaker Die to cut out the center area of the stocking. I taped the edges of the stocking onto the pink card panel and added a piece of clear acetate to the back of the stocking shape. To create the shaker part, I attached foam tape to the back of the card panel and filled it up with the Christmas Tree Mix . For the back of the shaker stocking, I used a piece of red cardstock that I decorated with dots using the Mini Polka Dots Stencil. For the sentiment, I cut out " Merry " in silver glitter foam and stamped " Christmas " in black ink on the top part of the stocking. Next, I cut out a cute Christmas tree from green card...

Thankful For You - Pretty Pink Posh

Hey crafty pals!  I have a cool box card to share. I had this idea of fitting the PPP mug into the Scallop Box Card , and guess what? It totally worked, and I'm beyond thrilled! So, let's dive into the nitty-gritty. I grabbed some Sage green cardstock and cut out the box card. I assembled the box and added in three inserts and jazzed things up with dies from the Fall Cornucopia and Fall Mug Additions Dies. I used Spellbinders cardstock for all those awesome dies. How adorable is that little fox peeking out of the mug, by the way? And speaking of the mug, I added a sweet design using the Deco Leaves Stencil and some Glacier White Ranges Pigment Ink . Now, here comes the fun part. I used the Fall Mug Additions Dies and Fall Cornucopia Dies to cut out various shapes in different cardstock colors. I glued these on the inserts, creating the cutest autumn scene you ever did see. Next up, I used hot foil to make the Thankful Script shine, cut it with the Thankful Shadow Die, and ...